Blogs about style, grooming, and make-up and how these things will help you get better in what you look and feel about yourself. And finally be the best version of you.
"Beauty will help you get the attention, personality will help you capture the heart, but attitude will help you make everything last."
The temperature is really rising day after day after day this summer. Times like these I'd love to wear comfortable clothes that will still show my personality.
Here's my take on what to wear on days like these. Classic Comfortable Style:
I'd like to wear love V-neck cut shirt like the one from Alternative Apparel.
Then pair it up with Dark Brown Corduroy pants from Zara or the Pleated Brown Corduroy pants (also from Zara).
I’d pick Toms Brown Canvass Desert Botas (the black one will do as well).
Then to cover from the scorching heat of the sun I’d wear scarf like the one from Emporio Armani to protect my neck.
Then wear Rayban Wayferer for my eye protection.
To add accents I might wear bracelets from tiangge or SM.
To complete the look I will use Neo Classic BB Cream for Homme from Faceshop to give me an even skin. The sheer coverage is perfect as it will not give you an overdone look plus the SPF20 that comes with it will protect your skin from sun exposure. Make sure to blend it really well, you don't want to look like you are wearing a mask. Blend, blend and blend. If you think you already blend it well, blend it some more (seriously).
Spot concealing with Covergirl concealer will help you complete the look.
Since it is really hot these days be sure to have a blotting paper with you ALL the time. Oil is your friend since it will help your skin maintain its youthfulness but oil is not really flattering to look at.
Hairstyles below will complement this look:
Hairstyle #01
Hairstyle #02
So what do you think of this look? I'd definitely sport this one.
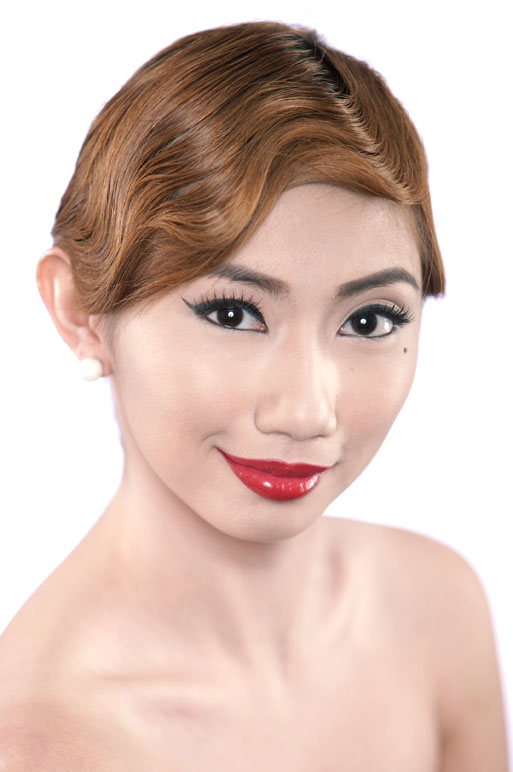
What do you think of red lip color? There are a few ladies that I know of are afraid of red lip color simply because red intimidates them or they think that red is just too bold for them. I can’t really blame them. Red with tone not flattering to one’s skin tone is bound for disaster. My make-up instructor introduced me to Revlon ColorStay Ultimate Liquid Lipstick in Top Tomato one day. She told me that this red lip color is flattering to most skin tone. She even wore it in class and I instantly fell for it.
Revlon ColorStay Ultimate Liquid Lipstick in Top Tomato
I went to the nearest beauty shop after class to check it out. I found out that it’s kind of expensive but the beautiful color it gives to my instructor’s lips gave me enough push (courage?) to purchase it.
What Revlon website says about it: · Food-proof lip color with a built-in, ultra-conditioning topcoat; · One-step application- No topcoat required for comfortable wear; · Stays comfortable and wears beautifully; · Does not feather or fade; no touch-ups required, even after meals.
Top Tomato is in liquid form. It’s truly red without any orange or mauve or pink tones. It has blue sparkly little things on it but once worn and has dried on the lips you hardly notices it. It dries into matte finish and very flattering to most skin types. It even makes your teeth looks whiter! Most of my clients told me afterwards that some of their friends were raving on how good they look with Top Tomato on their lips. They instantly become head turners themselves. Even boys started noticing them. What Revlon website says about it are mostly true except that the formula makes some of the lips dry. Since most mattes and long wearing lip colors tend to make lips dry, Top Tomato is no exemption. So I advice you apply generous amount of lip balm first and leave it for a minute or two before applying Top Tomato to moisturize and protect your lips. You also need to know that Top Tomato is kind of hard to remove, especially when you did not apply lip balm or moisture prior to wearing it. I also noticed that the color adopts to skin type of the one wearing it. Below are two of the clients I have who haven’t tried wearing red lip color before that I convinced to try Top Tomato and love it. They both look absolutely gorgeous with it.
Lizle loves to emphasize her fair skin, so red lip color will definitely flatter her pale skin (think of Snow White). But she hasn’t tried red before so she’s not really sure how she could pull it off. I reassured her that she would look beautiful on it.
She has a combination skin so I combined liquid and mouse type foundation for her skin.
I prep her skin first to make sure that her make-up will last since she will be partying all night. I applied a generous amount of lip balm on her lips to prep it for her matte red lip color later.
Then I used corrector under her eyes and set it with loose powder. Then mix two different colors of liquid foundation to match her skin tone. Then applied mouse foundation on her T-zone for the oily part of her skin. I applied concealer under her eyes extending up to her temples down to sides of her nose for flash photography during the party (you don’t want that dark shadow under-eye look on your photos, right?). Then spot concealing on areas that needed more coverage. Then I set the foundation and concealer with loose powder. Contouring and highlight are then applied.
On Lizle’s eyes: I first prime her entire eye area with NYX Eyeshadow Base in Skin Tone.
After the primer was set, using Dollface 88 Earth Color Palette, I put brown (skin tone) matte eye shadow (1). Then applied golden shimmer eye shadow on her lid towards the upper lash line (2). The same eye shadow is also applied on her lower lash line. Then lightly applied black matte eye shadow (3) from the outside corner of her lower lash line stopping ¾ towards the inner corner. Then using the same black matte shadow I apply tight lining on her upper lash line for full lash effect. (See image below for eyeshadow application with number guide for step by step application.)
Then I filled in her eyebrows with dark brown brow color.
On Lizle’s lips: Since her lips are well moisturized already, I used a red lipliner to shape her lips. Then applied Revlon ColorStay Ultimate Liquid Lipstick in Top Tomato at the center of her lips and filled the red of her lips using a lip brush. I applied a second coat after the first coat dries for long lasting lip color. Finally applied blush on her cheek for that flush from within look.
Listed below are the products used on Lizle to get the look. You may click on the product name for more info about it.
Jedda will be having her second baby’s 1st birthday party that day. She opted for a simple look with browns on her eyes. I suggested red lip color to go with it but she told me she hasn’t tried red lip color before. I told her we try it first and if she doesn’t like it then we replace it. She ends up loving it.
She has a normal skin (not oily, not combination) so liquid type foundation will suit her skin.
I prep her skin first to make sure that her make-up will last since she might be partying all night while taking care of her two girls. I applied a generous amount of lip balm on her lips to prep it for her matte red lip color later.
Then I used corrector under her eyes and set it with loose powder. Then applied liquid foundation to match her skin tone. I applied concealer under her eyes and spot concealing on areas that needed more coverage. Then I set the foundation and concealer with loose powder. Contouring and highlight are then applied.
On Jedda’s eyes:
I first prime her entire eye area with NYX Eyeshadow Base in Skin Tone.
Then using Kryolan 10 Eye shadow matte palette, I applied TV brown (1) matte eye shadow starting from the upper lash line and smoke it out just pass beyond her crease below the brow bown. The same eye shadow is also applied on her lower lash line.
Then lightly applied Anthracite (2) matte eye shadow from the outside corner of her lid and blending and fading it towards the center of the lid. The same eye shadow is also applied on the lower lash line ¼ of the outside corner. Then using the same black matte shadow I apply tight lining on her upper lash line for full lash effect.
Then Highlight (3) matte eye shadow is applied on the brow bone and blend it towards the TV brown matte eye shadow applied earlier. (See image below for eyeshadow application with number guide for step by step application.)
Then applied Maybelline Eye Studio black gel liner on her upper lash line, thicker line on the outer corner and fade into a thin line towards the inner corner.
I shaped Jedda’s eyebrows with dark brown brow color.
On Jedda’s lips:
Since her lips are well moisturized already, I used a red lipliner to shape her lips. Then applied Revlon ColorStay Ultimate Liquid Lipstick in Top Tomato at the center of her lips and filled the red of her lips using a lip brush. I applied a second coat after the first coat dries for long lasting lip color.
Then I applied two colors of blush for that flush from within look.
Listed below are the products used for this look. You may click on the product name for more info about it.
If not, go ahead and try it. It's definitely worth a try.
Rating: 4.5 out of 5 Pros: -Amazing Red Color -Long Lasting -Flattering Red Color -Makes Teeth Looking Whiter -Does not Fade -Food-proof -No need or less retouching
One thing I like about grooming and make-up is the makeover. You get to use your artistic skill to bring out the great features of the person you are doing make-up and hide the parts that they do not want to be highlighted. Sometimes people are used to their daily make-up routines that they no longer made an impact because it is the look that they always wear – so makeovers from time to time will help people see them differently and it’s very refreshing.
My friend Marge, the very good/artistic jewelry designer of Estrellas Manila and entrepreneur for Wall to Wall, and I paid a visit to our friend Engie (one of my make-up artist friend and mentor) and Pen (photographer) apartment so that they could check out my make-up skill. I get to do makeovers on Marge and Engie that day but I will be showing you today the look that I created for Marge.
Marge is acidic so foundation tends to turn darker when contact with her skin. She also has a very oily skin. Under eye puffiness that are slightly darker that the rest of her skin are some of her main concerns. These are the things that I need to consider in doing her makeover.
First I have to prep her skin (I will have a separate entry on this including primer…). I first use corrector under her eye to combat dark under eye circles and puffiness and set it with loose powder. Then mix two kinds of foundation to match her skin tone. Making sure that the products I used for her are water based since she naturally has oily skin. Then spot concealing on areas that needed more coverage. Then I set the foundation and concealer with loose powder. Contouring and highlight are then applied.
Skin Prep the first step to a flawless face
On to her eye makeup, I first use primer on her entire lid to help eyeshadows to become more pigmented and will last longer since we’re having lunch later that day and probably end up having dinner there also. Then I applied eyeshadow with the same color as her skin from her lash line up to her brow bone as base. Then applied darker brown with orange tone on her entire lid. Then darker brown (darker than the brown with orange tone) is applied to outer part of the eye and blend it up to her crease to create depth and contour. With the same eyeshadow color I also applied it on her lower lash line. Then apply black eyeshadow close to upper lash liner. To finish it off, I applied a pearly flesh tone on her brow bone, inner corner of the eyes, and center of the lid to highlight that part of her eye. Make sure that every shade is well blended.
Then I applied gel eyeliner on her upper lash line and extend it slightly to create a wing effect. This will help contour her eyes more. I curl her eyelashes and put on a single coat of mascara. Then I applied two false eyelashes (the second one cut in half and put it in the outer part of the eye) and put another coat or two of mascara.
I just filled in her eyebrows with dark brown color for more definition.
To make a natural looking blush I combined two blush colors. First a peach shade and on top of that a cinnamon blush shade is applied.
Since I am going for a natural look on her I put on a lipstick with a beige peach shade on it on top of a lip liner.
And that finishes the look.
Check the before-and-after look below:
Marge used Anime contact lens
Her make-up stayed the whole day until she removed it. Her skin becomes a bit oily on the evening but blotting it with tissue and it’s good as new.
Check the video below where Pen interviewed me about how I feel about the look I just made for Marge.
Having fun after the makeover
Listed below are the products used for this look. You may click on the product name for more info about it.
Wow, first blog entry. This is kind of big, right? I’ve been debating whether I should start my own blog about grooming and make-up or not. After a lot of thinking I finally told myself, why not, after all this is my job now so why not talk about it.
My makeup tools
photo by afamaphotography
I left my job that pays me well to become a full time freelance photographer, make-up, stylist and digital artist. I’ve dedicated most of my career in a corporate world and I thought this would be the perfect year to start focusing on the artistic part of me.
This blog, however, will focus on the make-up side of it. First of all, I graduated at Center ofAesthetic Studies (CAS) last year and ever since I’ve been doing a lot of make-up and grooming for wedding, portfolio shoots, TV commercials, and other clients.
Why make-up? You might ask me. In photo shoots there were times that the make-up artists we hire flaked on us. Everyone was already there so it’s really a waste not to go through with it. With my background in watercolor painting I tried painting our models’ faces with their own make-up so we could continue with the shoot. The outcome turned really well and I started liking doing make-up. I find make-up application easier as compared to watercolor (where you will be working on a blank paper).
Also, as a photographer I’ve wanted to create a coffee book table about images that I could capture and immortalized them in a book. I’ve had a lot of make-up artist friends but most of them are already well known in the industry and their schedules are insanely full – it’s hard to just sit with them and discuss my idea.
A perfect opportunity came when my friend was telling me that she wanted a new hobby and I told her why not take up make-up class, I suggested. She only agreed when I told her that I’d be joining her. She did not, however, take up the class because her boy friend then proposed to her and they needed to save the money on their big day. Since I already paid for my tuition fee, I continued the class. So here I am now, a full pledge make-up artist (and I’d probably be doing my friend’s make-up on her wedding day next year).
I idea of this blog is to show the readers the power of makeup and how it can enhance the natural beauty of each individual that I painted on. I also will be showing different looks that I already created and will be creating in the future. I’ll share different tips, tricks and suggestions. I’ll be showing how to correct make-up oversights and probably products that you may want to use and consider buying. Products and make-up tools review and more are included also in my repertoire.




 Posts


