"Beauty will help you get the attention, personality will help you capture the heart, but attitude will help you make everything last."

Splurge!

Legendary Special Effects Make-up Artist Rick Baker colaborates with MAC...

Splurge!

Rihanna Collaborates with MAC Cosmetics for Riri Hearts Fall 2013...

Editorial!

Editorial featuring Sam Ajdani wearing Suits for the modern man...

Tools Of The Trade!

Read my review on ArtNet Professional Brush #153...

Behind The Scenes!

Hair and Make-up for Katrina! Click here...

Beauty Feature!

Eye Makeup with the Colors of Spring 2013!

Showing posts with label photography. Show all posts

Wednesday, June 26, 2013

Editorial! Falling for Suits!


I can finally post the editorial shoot I had with Diaryo Filipino in their Life & Style section on their May 2013 issue. The editorial was shoot in UP Diliman featuring supermodel and current "It Guy" Sam Ajdani of PMAP (Professional Models Association of the Philippines) who is a very nice guy and I had so much fun working with him.

Styling Jhay Layson features different kind of suits that will make regular guys look a lot better. Stylist apprentice Aldrin Ramos helped Jhay in styling Sam for the shoot. While make-up artist Nanan Villalba make sure Sam looks his best.

Photography: Henry G. Anima II
Model: Sam Ajdani
Styling: Jhay Layson
Grooming: Nanan Villalba

See the full editorial below:


Friday, May 17, 2013

Behind The Scenes! Photo Shoot With Model Katrina!


I had the privilege of working with very beautiful Filipina-Spanish Model Katrina earlier today as her Hair and Make-up Artist. I created three looks for her photo shoot today. Katrina is very pretty already so it's really easy to made her up. I really had fun creating different looks on her.

Our photographer for today's shoot was Celwyn - who is also a TV/TVC director.

Please check some of the Behind The Scenes photos below:

Finishing her lip color.

Katrina's Before and After (1st look).

As you can see even without make-up she's so pretty. I just color corrected her complexion and enhance her beautiful features.

Katrina's first look. Photos taken by my iphone 4s.

1st look is natural beauty. I just enhance her already beautiful features.

Katrina's second look. Photos taken by my iphone 4s.

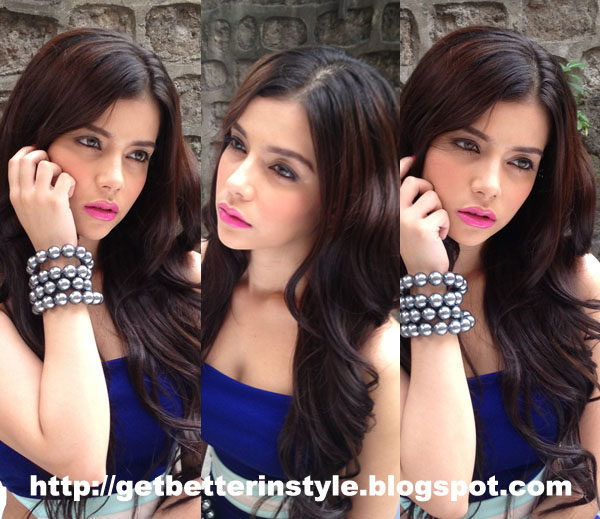
On the second look, I changed her lip color with bubble gum - neon pink and lined her lower water line with khol pencil and set with powder to prevent the khol from transferring outside the water line.

 Katrina's third look. Photos taken by my iphone 4s.

On her final look, I removed the pink lip color and massage her lips with lip balm before putting the red lip color. And I loaded lots of mascara on her natural lashes as this look requires no false eyelashes. I also darkened the outer corners of her eyes.

I hope you like Katrina's different looks that I created for her photo shoot today.

Don't forget to comment on what's your favorite look and ask questions if you have any.

See below our photos together:


Sunday, May 12, 2013

Beauty Feature! Colors of Spring 2013!


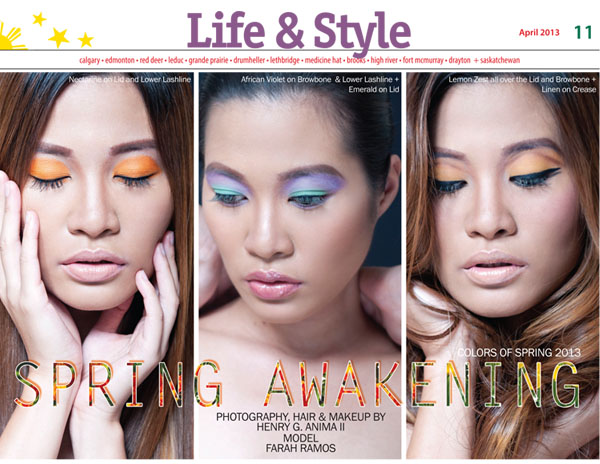
Finally I was able to post here the beauty Feature I did on the Life & Style Section of Diaryo Filipino. The theme for the feature are the colors of Spring 2013 for eye makeup.

Spring for me is about new beginnings and having fun. And I wanted to express these ideas and display   it as eye makeup for women to wear. I hope these looks will appeal to women and have fun with it.

Below are the colors of Spring 2013 that I used as an inspiration:

Image courtesy of http://www.thefashionistas.org/blog/wp-content/uploads/2013/01/Pantone-colors-spring-2013.jpg

Below is the Beauty Feature:


Check the individual photos below for details:


Look 01: Nectarine on lid and lower lashline


Look 02: African Violet on browbone and lower lashline + Emerald on lid


Look 03: Lemon Zest all over the lid and browbone + Linen on crease

I hope you like all the looks I created as featured on April 2013 issue of Diaryo Filipino.

Sunday, March 24, 2013

Adventure Time! Winter in Hong Kong!


Hong Kong, OOTD

I instantly like Hong Kong from the first time I went there (with my mom, my aunt and my youngest brother last 2010). And going back to Hong Kong this year on a colder weather makes it more exciting for me.

Last February, I went back to Hong Kong with my friends. It was their first time to go there so I got really excited to be their tour guide. We decided to stay in Tsim Sha Tsui since my friends love shopping a lot. I thought it would be a great place to start shopping since a lot of shops flooded the area.

Outfit of the Day at Tsim Sha Tsui: checkered button down shirt from Levi's, gray jacket from Dockers, tapered pants from Wrangler, sandals from Sanuk, faux fur hat from 21Men, herringbone scarf from Forever21, sunglasses from Vanz, camera sling bag from Crumpler, black arm band from H&M, red arm band from tiange.

At the immigration in Hong Kong: cap by Penshoppe, v-neck t-shirt from Giordano, jacket shirt from W by Rajo.

When we arrived at the Hong Kong international airport I got more excited because I see fogs everywhere meaning the weather will be a lot colder there; we can roam around the city on foot without having to worry about heat, humidity and sweating (profusely).

We had our lunch at the airport first before we bought our 3 day unlimited train ride tickets. I really recommend this one because you will be having an access to Airport Express going to and from Hong Kong downtown plus unlimited rides to all trains (MTR) within Hong Kong for 3 days. And if you are staying a bit longer (in our case we stayed for four (4) days) you can buy additional credit from any train station. Don't worry if you'll end up buying more credits because you can always refund the extra credit once you go back to the airport.

We got ourselves a map to guide us. The map is free so feel free to grab one if you don't have one with you. From the Airport going to Tsim Sha Tsui was easy. In our case we first took the Airport Express Line (the green line) and stopped at Tsing Yi station. Then took the Tung Chung Line (the orange line) stopping at Lai King station before taking the Tsuen Wan Line (the red line) which finally lead us to Tsim Sha Tsui.

Please click on the map below to see Hong Kong's MTR system:

Image courtesy of: http://vendyxiao.com/wp-content/uploads/2012/01/hong-kong-MTR-map01.jpg

I was not able to take photos of my OFTD on our first day because we got too busy exploring Hong Kong. But here's what I wore on our second day:

Outside Tsim Sha Tsui Train Station. I'm all wrapped up because it was so cold that day. I decided to wear Sanuk sandals because we're going to walk most of the time and I want something comfortable to wear.

The scarf helps a lot to combat the cold weather. Herringbone scarf from Forever21, sunglasses from Vanz, black leather arm band from H&M also available in brown, red leather arm band from tiange also available in different colors.

Battery juice accessory from ibattz for iphone 4s for extra battery power.

Green/Black camera sling bag from Crumpler.

Black/Gray Herringbone sandals from Sanuk.

Locals call this landmark as "The Black Guy."

At The Peak Tram station. The tram goes all the way up to the peak. At The Peak you can have a great view of Hong Kong. You can also find Madame Tussauds Wax museum here.

Overlooking Hong Kong from The Peak. It's windy and cold up here.

With some tourist at The Peak.

The faux fur hat shielded my ears from the freezing wind. Faux fur hat from 21Men, herringbone scarf from Forever21, sunglasses from Vanz.

A mall across The Peak.

 Hong Kong Island city scape; A view from the Avenue of the Stars.

 Wrist watch from Giordano.

Goofing around at the Avenue of the Stars.

We went to a lot of places on our second day and of course we ended the day shopping. LOL.

Photos by James Reido
Follow my blog with Bloglovin

Monday, February 18, 2013

Get The Look! Black And Red Butterfly Eye Makeup!


I was asked to help Yeoh Models for their Spring Summer 2012 Package shoot. The inspiration behind the look for the girls for the shoot is the dark shade surrounding the eyes of a raccoon. During the shooting day, we (the make-up artists) were told to modify the color of the eyeshadows as we like as long as we still include black eyeshadow and retain the shape of the raccoon eyes.

For the model's eyeshadows, I chose the red eyeshadow to mix with black to mimic the color of the wings of a black-and-red butterfly. I really like the outcome and I will be sharing you today how to recreate the look.


Model: Patricia Go of Yeoh Models
Photo & Make-up: Henry G. Anima II
Hair: Mycke Arcano


For this look I use NYX Makeup Make-up Artist kit (photo shown above).


I marked the eyeshadows in the palette for easy eyeshadow reference.

Black and Red Butterfly Inspired Eye Makeup:

Follow the simple steps to below to achieve the look.

Note: Placed the product/s on the space enclosed in white line on the photo above each steps.


Step 01:
Prime and put eye makeup base on the entire eye area starting from upper lash line up to the brow bone. I use NYX Eyeshadow base in skin tone.


Step 02:
Using a blending brush like Mac 224 place black eyeshadow in D3 on the outer eye area and swipe it on the crease towards the inner eye area near the nose. Make sure to use gentle strokes so that the less eyeshadows will be placed on the inner eye area of the crease.


Step 03:
Using a dome eyeshadow brush like Mac 239 place red eyeshadow in F6 on the lid area. Carefully blending it on the edge of the black eyeshadow placed from the previous step. Add more layer of the red eyeshadow depending on the intensity of the color that you want to achieve.


Step 04:
Using a eyeliner brush like Mac 210 place a black gel or cream liner on the upper lash line. Then smudge the gel/cream using Marionnaud No. 8 pencil brush.


Step 05:
Using Marionnaud No. 8 pencil brush place red eyeshadow in F6 on the lower lash line. Starting from the outer eye corner towards the inner eye corner. Make sure that you blend the eye shadow well.


Step 06:
Using a small angle brush like Mac 208 place a black gel eye liner on the lower waterline. Then slightly blend it on the lower lash line.


Step 07:
Using Marionnaud No. 8 pencil brush place black eyeshadow in D3 on the lower lash line to blend the black gel eye liner.


Step 08:
Using a blending brush like Mac 217 combine eye shadows in D1 and D6 the place it on the brow bone towards the inner eye corner in a wild shield wiper motion. Make sure to blend the edges well.

Then Curl your eyelashes with Shu Uemura Eyelash Curler. Apply 2 coats of Maybelline The Magnum Volum' Express Waterproof Mascara (let the mascara dry for 3 to 5 seconds before applying the second coat) from roots to tips. Add false eyelashes to your liking.

Below are the finished look:

Eye Makeup with eyes close.

Eye Makeup with eyes open.

For Patricia's Brows:

For her eyebrows I use wet n' wild ultimate brow kit powder in Ash Brown. I use the lighter one using MAC 208 brush. I first fill in the highest point of the arch towards the tip of the eyebrow before filling in the part near the nose.

Tip: Try to draw the shape first and check if you like it before putting more eyebrow powder. It's always easier to pack colors than removing the excess. I hope this helps.

For the Face:

I use 2 color of True Match foundation to achieve her skin color. Then I mix nyx, kryolan and covergirl concealer on under eye area, sides of the nose/mount and on spots that need concealing. Then I use kryolan transparent loose powder to set the makeup using E.L.F. powder brush.

For the Cheeks:

I use Maybelline blush in peach and cinnamon using Nars Yachiyo brush. Note: You should put lip balm like Carmex after skin prep.

For the Lips:

Step 01: Line the entire lip area (upper and lower lips) with Etude House Lip Liner in Natural. Purse lips together to distribute lip liner evenly.

Step 02: Apply Kryolan Lipstck in #LF401 (nudel-coral shade). Purse lips together. Repeat this step twice or thrice depending on how long you want your lipstick will stay.

Step 03: Then add a coat of Kryolan Lipstick in #LC132 for that hint of orange. Purse lips together.

Step 04: Set lipstick by pressing tissue in between your upper and lower lips.

Step 05: Apply Etude House clear Lip Gloss in the Middle of your lower lip.

I hope you like her look and like the tutorial too. Let me know if you are able to recreate the look and what you think about it.

Enjoy!

Sunday, February 3, 2013

Get The Look! Pin-up Inspired Makeup for Slimmetry!


I've got the chance to do the makeup and photography for Slimmetry's Ad Campaign. Slimmetry is a clothing brand specializing in Body Forming Corsets and Swimwear. And the makeup for the campaign is inspired by pin-up girls of 1950's. This decade celebrates the voluptuous curves of women and that's what Slimmetry is trying to offer women now - achieving the curves you deserve.


Our model for the campaign is Tanja Winheim - a Spanish/Filipina beauty. The make-up is so sexy and yet so easy to achieve. And it fits for all women. To get the look, just follow the simple steps below:


You may use Dollface 88 Earth Color Palette to create this look.

Tanja's 1950's Eye Make-up:

Note: Placed the product/s on the space enclosed in white line.


Step 01: Prime and put eye makeup base on the entire eye area starting from upper lash line up to the brow bone. I use NYX Eyeshadow base in skin tone.


Step 02: Then using medium shading brown eyeshadow with red undertone, swipe in a windshield wiper motion starting from the outer corner to the inner corner of the eye area to define the crease using a blending brush. I use a Artnet #154 brush to deposit and blend the eyeshadow.


Step 03: Then place a matte skin tone eye shadow on the entire lid and blend it well on the edge of the crease using a dome eye shadow brush. I use Artnet #112 brush to pick-up and deposit color.


Step 04: Then place a matte black eyeshadow on the outer V and outer crease of the eye using a pencil/pointed brush. Make sure to blend the eyeshadow well with the crease color. I use Marionnaud #8 brush to pick-up and define the color.


Step 05: Then place a shimmer vanilla eyeshadow on the inner corner of the eye, center of the lid and the brow bone area to create highlight using a small dome eyeshadow brush. I use the brush that comes with the 10-piece brush set from Suesh.


Step 06: Then place the same eyeshadow color that define the crease on the lower lash line using the a pencil/pointed brush. I use Marionnaud #8 brush to deposit and blend color on the lower lash line.


Step 07: Then I place a matte black eyeshadow on the other part of the lower lash line to mimic a shadow that coming from the lashes when hit a light source from above. I use the same from from previous step.


Step 08: Place an eyeliner gel on the upper lash line and wing it out on the outer corner eye to create a sexy kitten wing that is famous during the 1950's. I use E.L.F. cream eyeliner in black to create this look. I use Fanny Serrano #14 slant eyebrow/eyeliner brush to get the wing and the line.

That finishes the eye makeup. Easy right? Now you can recreate this eye makeu-up on yourself.


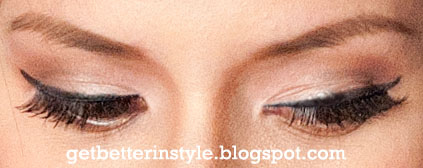
Here's the eye makeup when looking down.


And here's the eye makeup when eyes are open.

For the lips:

I use Etude lip liner to define the shape of the lips then I use Top Tomato by Revlon to get that luscious red color using Artnet lip brush.

For the Face:

I use 2 color of True Match foundation to achieve her skin color. Then I mix nyx, kryolan and covergirl concealer on under eye area, sides of the nose/mount and on spots that need concealing. Then I use kryolan transparent loose powder to set the makeup using E.L.F. powder brush.

For Cheeks:

I use Maybelline blush in peach and cinnamon using Nars Yachiyo brush.

For Eyebrows.

I use wet n' wild eyebrow kit to define her brows using Marionnaud #9 brush.

I hope you like her look and like the tutorial. Let me know if you are able to recreate the look.

See photos below for the ad campaign. Enjoy!


Related Posts Plugin for WordPress, Blogger...