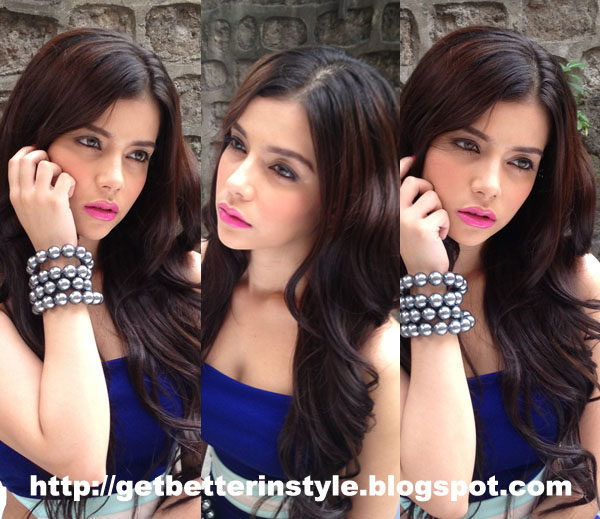
"Beauty will help you get the attention, personality will help you capture the heart, but attitude will help you make everything last."

Splurge!

Legendary Special Effects Make-up Artist Rick Baker colaborates with MAC...

Splurge!

Rihanna Collaborates with MAC Cosmetics for Riri Hearts Fall 2013...

Editorial!

Editorial featuring Sam Ajdani wearing Suits for the modern man...

Tools Of The Trade!

Read my review on ArtNet Professional Brush #153...

Behind The Scenes!

Hair and Make-up for Katrina! Click here...

Beauty Feature!

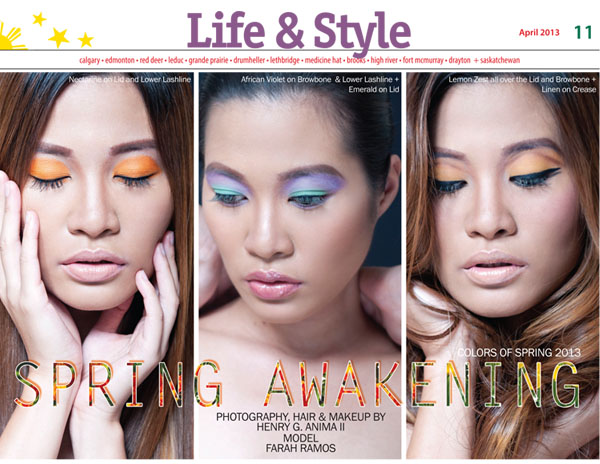
Eye Makeup with the Colors of Spring 2013!

Showing posts with label makeup. Show all posts

Tuesday, December 31, 2013

The Bride! Dinesh And Diane Wedding Day Video!


Make-up: Makeup Artistry by Hxero
Hair: Mylene Amorado-Sarmiento
Video: Deo Angeles

Get the look:

Eyes:
Nyx Eyeshadow Base
Kryolan Eyeshadow
Urban Decay Naked 2
Maybelline 24 Hour Gel Liner

Eyebrows:
Wet N Wild Ultimate Brow Kit Powder

Eyelashes:
Shu Uemura Eyelash Curler
LandMark Flase Eyelashes
Maybelline Volum' Express Waterproof Mascara

Lips:
Carmex Lip Balm
Kryolan Lipstick

Face:
Dermacolor Concealer
MAC Pro Longwear Concealer
MAC Studio Fix Fluid Foundation
Kryolan Setting Powder
Maybelline Blush Powder
"Thank you for the amazing work you did on both myself and my girls for our wedding on Sept 22,2012 as well as on my pre wedding pictorials.Thank you Henry Anima II for being a part of our special day with Dinesh. We received many compliments on how we looked and felt so comfortable, natural and beautiful. YOU are an outstanding artist!!! I will for sure continue to recommend you to anyone I know..
Take care and keep in touch!" - Diane

Friday, October 25, 2013

Face Form! Sleek Contouring and Blush Palette Preview!


I bought 3 palettes of Sleek Makeup's Face Form Contouring and Blush Palette. I have yet to try these on the models to know if these are good. I have high hopes on these palettes. I think these are good if I based it on the swatches I made at the counter. Let's see after I applied it on the models.

Photo below shows the three palettes I bought. The palette cost Php 350.00 for the small one and Php 900.00 for the big ones.


I'll update this post once I already tried and used them.

Friday, May 17, 2013

Behind The Scenes! Photo Shoot With Model Katrina!


I had the privilege of working with very beautiful Filipina-Spanish Model Katrina earlier today as her Hair and Make-up Artist. I created three looks for her photo shoot today. Katrina is very pretty already so it's really easy to made her up. I really had fun creating different looks on her.

Our photographer for today's shoot was Celwyn - who is also a TV/TVC director.

Please check some of the Behind The Scenes photos below:

Finishing her lip color.

Katrina's Before and After (1st look).

As you can see even without make-up she's so pretty. I just color corrected her complexion and enhance her beautiful features.

Katrina's first look. Photos taken by my iphone 4s.

1st look is natural beauty. I just enhance her already beautiful features.

Katrina's second look. Photos taken by my iphone 4s.

On the second look, I changed her lip color with bubble gum - neon pink and lined her lower water line with khol pencil and set with powder to prevent the khol from transferring outside the water line.

 Katrina's third look. Photos taken by my iphone 4s.

On her final look, I removed the pink lip color and massage her lips with lip balm before putting the red lip color. And I loaded lots of mascara on her natural lashes as this look requires no false eyelashes. I also darkened the outer corners of her eyes.

I hope you like Katrina's different looks that I created for her photo shoot today.

Don't forget to comment on what's your favorite look and ask questions if you have any.

See below our photos together:


Sunday, May 12, 2013

Beauty Feature! Colors of Spring 2013!


Finally I was able to post here the beauty Feature I did on the Life & Style Section of Diaryo Filipino. The theme for the feature are the colors of Spring 2013 for eye makeup.

Spring for me is about new beginnings and having fun. And I wanted to express these ideas and display   it as eye makeup for women to wear. I hope these looks will appeal to women and have fun with it.

Below are the colors of Spring 2013 that I used as an inspiration:

Image courtesy of http://www.thefashionistas.org/blog/wp-content/uploads/2013/01/Pantone-colors-spring-2013.jpg

Below is the Beauty Feature:


Check the individual photos below for details:


Look 01: Nectarine on lid and lower lashline


Look 02: African Violet on browbone and lower lashline + Emerald on lid


Look 03: Lemon Zest all over the lid and browbone + Linen on crease

I hope you like all the looks I created as featured on April 2013 issue of Diaryo Filipino.

Monday, February 18, 2013

Get The Look! Black And Red Butterfly Eye Makeup!


I was asked to help Yeoh Models for their Spring Summer 2012 Package shoot. The inspiration behind the look for the girls for the shoot is the dark shade surrounding the eyes of a raccoon. During the shooting day, we (the make-up artists) were told to modify the color of the eyeshadows as we like as long as we still include black eyeshadow and retain the shape of the raccoon eyes.

For the model's eyeshadows, I chose the red eyeshadow to mix with black to mimic the color of the wings of a black-and-red butterfly. I really like the outcome and I will be sharing you today how to recreate the look.


Model: Patricia Go of Yeoh Models
Photo & Make-up: Henry G. Anima II
Hair: Mycke Arcano


For this look I use NYX Makeup Make-up Artist kit (photo shown above).


I marked the eyeshadows in the palette for easy eyeshadow reference.

Black and Red Butterfly Inspired Eye Makeup:

Follow the simple steps to below to achieve the look.

Note: Placed the product/s on the space enclosed in white line on the photo above each steps.


Step 01:
Prime and put eye makeup base on the entire eye area starting from upper lash line up to the brow bone. I use NYX Eyeshadow base in skin tone.


Step 02:
Using a blending brush like Mac 224 place black eyeshadow in D3 on the outer eye area and swipe it on the crease towards the inner eye area near the nose. Make sure to use gentle strokes so that the less eyeshadows will be placed on the inner eye area of the crease.


Step 03:
Using a dome eyeshadow brush like Mac 239 place red eyeshadow in F6 on the lid area. Carefully blending it on the edge of the black eyeshadow placed from the previous step. Add more layer of the red eyeshadow depending on the intensity of the color that you want to achieve.


Step 04:
Using a eyeliner brush like Mac 210 place a black gel or cream liner on the upper lash line. Then smudge the gel/cream using Marionnaud No. 8 pencil brush.


Step 05:
Using Marionnaud No. 8 pencil brush place red eyeshadow in F6 on the lower lash line. Starting from the outer eye corner towards the inner eye corner. Make sure that you blend the eye shadow well.


Step 06:
Using a small angle brush like Mac 208 place a black gel eye liner on the lower waterline. Then slightly blend it on the lower lash line.


Step 07:
Using Marionnaud No. 8 pencil brush place black eyeshadow in D3 on the lower lash line to blend the black gel eye liner.


Step 08:
Using a blending brush like Mac 217 combine eye shadows in D1 and D6 the place it on the brow bone towards the inner eye corner in a wild shield wiper motion. Make sure to blend the edges well.

Then Curl your eyelashes with Shu Uemura Eyelash Curler. Apply 2 coats of Maybelline The Magnum Volum' Express Waterproof Mascara (let the mascara dry for 3 to 5 seconds before applying the second coat) from roots to tips. Add false eyelashes to your liking.

Below are the finished look:

Eye Makeup with eyes close.

Eye Makeup with eyes open.

For Patricia's Brows:

For her eyebrows I use wet n' wild ultimate brow kit powder in Ash Brown. I use the lighter one using MAC 208 brush. I first fill in the highest point of the arch towards the tip of the eyebrow before filling in the part near the nose.

Tip: Try to draw the shape first and check if you like it before putting more eyebrow powder. It's always easier to pack colors than removing the excess. I hope this helps.

For the Face:

I use 2 color of True Match foundation to achieve her skin color. Then I mix nyx, kryolan and covergirl concealer on under eye area, sides of the nose/mount and on spots that need concealing. Then I use kryolan transparent loose powder to set the makeup using E.L.F. powder brush.

For the Cheeks:

I use Maybelline blush in peach and cinnamon using Nars Yachiyo brush. Note: You should put lip balm like Carmex after skin prep.

For the Lips:

Step 01: Line the entire lip area (upper and lower lips) with Etude House Lip Liner in Natural. Purse lips together to distribute lip liner evenly.

Step 02: Apply Kryolan Lipstck in #LF401 (nudel-coral shade). Purse lips together. Repeat this step twice or thrice depending on how long you want your lipstick will stay.

Step 03: Then add a coat of Kryolan Lipstick in #LC132 for that hint of orange. Purse lips together.

Step 04: Set lipstick by pressing tissue in between your upper and lower lips.

Step 05: Apply Etude House clear Lip Gloss in the Middle of your lower lip.

I hope you like her look and like the tutorial too. Let me know if you are able to recreate the look and what you think about it.

Enjoy!

Monday, January 21, 2013

TOTT! ELF Powder Brush (Flat Top)!

The best way to make foundation and makeup last is setting it with powder. And how you apply the powder is very important. Equally as important is the tool you use to apply the powder.

Other than the powder puff, which is one of the best btw, the E.L.F. Powder Brush (Flat Top) is my one to go to brush in setting foundations with powder. In fact it’s the only thing I use nowadays with my clients. The brush is so much easier to clean than the powder puff.

What I really like about this brush is the fact that it has a flat top. Its flat top is perfect in setting in the foundation. If you put the powder onto the skin using the flat top it will seal the foundation onto your skin completely (almost).


Unlike a traditional powder brush, which takes away the foundation when you swipe it onto the skin with powder, elf powder brush will not. As you tap the flat top of the brush on your skin with powder it will press the foundation making it stick with the skin even more.

 Here's what the website describe this brush:
This new anti bacterial, synthetic haired Taklon brush is softer and more absorbent and can be used with wet or dry products. Be a professional makeup artist and create a flawless look with this e.l.f. studio brush! Creates a professional sculpted look. Full coverage colour. Use for powder or blush for perfect contouring.
The brush is soft but sturdy enough not to give when the flat top is press onto the skin.When I set the foundation with powder I dip the brush into powder and tap off the excess. Then I tap powder using the flat top starting from the forehead going to the hairline then down to the cheek area then the outer part of the face. I tap and press as I go making sure that every part of the face that I applied with foundation was never skipped. This way the, I am confident that the foundation will not budge, will stay put and will last longer.

For demo purposes I'm using a darker foundation than my skin color to make the result more visible.

Step 01: Place enough powder on the cover of the powder container.
Step 02: Dip brush.
Step 03: Tap off the excess.
Step 04: Tap and press the flat surface of the brush onto the skin.


Easy, right? Check below photos to compare the area without and with powder.


The area we set with powder using E.L.F. powder brush looks natural and flawless.

Other that setting the foundation with powder. I also use this brush to contour the face. The side of the brush is perfect for creating that nose line and that line under the cheek to make your face look slimmer. Then I used the flat part to blend where I contour to eliminate harsh line.

I have two. One for setting the powder (taped with red-green tapes) and the other one is for contouring (taped with red-green-yellow tapes).


The brush is so easy to clean, since it is synthetic made of Taklon it also dries a lot quicker than my other synthetic brushes.

I've heard that other people also use this brush for putting foundations (liquid, cream, powder, etc.) but I haven't tried it yet since I already found other brushes perfect for that job. Some even use this brush in applying blush on the apples of the cheek. That's how versatile this brush is. And I say these reasons make this brush a keeper.

Plus the Php 249.00 price tag doesn't really hurt the pocket.

There's nothing bad that I can think of to say against this brush, really.

Verdict: Love. Like. Nice. Skip. Drain.

This brush is really nice to have and has become a 'must have' in my kit.

Saturday, January 12, 2013

Quick Tip! Save Your Favorite Mascara Wands!


Do you hate it when you have to throw away your empty mascara tube along with it your favorite mascara wand? Or having your favorite mascara but you doesn’t really like the wand that comes with it? I certainly do.

Now, I got a little quick suggestion for you. Throw your empty mascara tube but save the mascara wand. Just clean your wand and reuse it! Here’s how I do it:

First, gather all the things you need:


Your empty mascara tube with your favorite wand with it.


Dishwashing soap (preferably with antibacterial formulation) and bowl or container (big enough to soak the wand).


Brush cleaner.

Tissue or towel, old toothbrush and zip locks.

Here’s how I clean my favorite mascara wands:
  1. Put dishwashing soap in an empty container.
  2. Soak your favorite mascara wand overnight. This will remove the mascara from the wand when mixed with dishwashing soap.
  3. Brush gently your mascara wand with old toothbrush to remove mascara off the wand.
  4. Put your wand under running water until all mascara is gone.
  5. Then roll your wand on a towel to dry it.
  6. Then place your wand on top of a tissue and spray it with a brush cleaner.
  7. Then roll it on the tissue and place it on top of another tissue to dry.
  8. Now your favorite mascara is clean and is now ready to use. Just put it on a zip lock for storage and to prevent it from getting dirty.

How to use your favorite mascara wand:
  1. Choose your favorite mascara then take ample amount off the mascara (from the wand that comes with it) and place it on a mixing palette or at the back of your hand.
  2. Get your favorite (clean) mascara wand and swipe it gently on the mascara you placed on the mixing palette or at the back of your hand.
  3. Swipe the mascara onto your lashes.
  4. Now you have a great looking lashes using your favorite mascara and your favorite mascara wand.
Easy, right?

Let me know what you think about it.

Friday, January 11, 2013

DIY! Mix Your Own Lip Color in 4 Easy Steps!


Sometimes when you are mixing and painting two different colors of lipstick on a client (or yourself) the process can be messy and can be time consuming. Sometimes you end up putting color on other tube then staining and ruining the original color. To save time and prevent you from getting messy during mixing two different colors of lipstick (on actual makeup application) follow the simple steps to create your own mix of lip color below.

Note: If you are a kid make sure you ask your parent (or an adult) to assist you.

Click here to go directly to the 4 easy steps.

Things you need:


1. Your favorite lipsticks in different colors.


2. Spatula for taking small part of lipstick from a tube and mixing lipsticks together.


3. Teaspoon or


Tablespoon (for larger container).


4. Empty lipstick palette or


Empty tiny jars (you can buy from Landmark, Beabi or Muji) to put your lip mix.

5. Flame (from a stove or from a candle).

Here are the 4 easy steps:


  • Using the spatula, slice a portion of your favorite lipstick and place it on the spoon. Clean your spatula then slice another portion of lipstick with different color and add it to the first lip color. It is up to you to place the ratio of two different colors. Just add some more to achieve the color you want.
  • Then place it above a flame with medium heat (I place mine over a stove but you may use a candle and it will do the trick) to melt.
  • Mix the lipstick by stirring then well with spatula when melted to get an even mixture.
  • Place the mixture on an empty palette or jar and allow the mixture to harden.

Congrats! You got yourself a new shade of lip color! Just use your lip brush to get color from the pan and apply it to yourself. Easy, right?

Enjoy creating your lip color too and let me know what you think about it.

That's it but you may check more photos below for more color mixtures I created.


Here's another mixture. Lovely color, right?


You may also mix the two lip colors together before melting to create your new lip color a bit faster.

I created a total of 11 lip colors by mixing different lip colors and different rations. Check all the colors and ratios below:

Mix 1, 2 and 3.

Mix 4, 5 and 6.

Mix 7, 8 and 9.

Mix 10 and 11.

And here are the new shades of lip colors I created on a palette. I numbered the colors based on the mixtures above. The ones with no numbers are the original shades I used to create the new lip colors.

Palette 1.

Palette 2.


QUICK TIP: If you are a bit OC you may use hair blow drier to make your lip color look even and a lot better in your palette. Just let the heat from the blower melt the top part slowly to even it out in the palette (see photo below).


Happy mixing!!!

Related Posts Plugin for WordPress, Blogger...