Blogs about style, grooming, and make-up and how these things will help you get better in what you look and feel about yourself. And finally be the best version of you.
"Beauty will help you get the attention, personality will help you capture the heart, but attitude will help you make everything last."
I can finally post the editorial shoot I had with Diaryo Filipino in their Life & Style section on their May 2013 issue. The editorial was shoot in UP Diliman featuring supermodel and current "It Guy" Sam Ajdani of PMAP (Professional Models Association of the Philippines) who is a very nice guy and I had so much fun working with him.
Styling Jhay Layson features different kind of suits that will make regular guys look a lot better. Stylist apprentice Aldrin Ramos helped Jhay in styling Sam for the shoot. While make-up artist Nanan Villalba make sure Sam looks his best.
Photography: Henry G. Anima II
Model: Sam Ajdani
Styling: Jhay Layson
Grooming: Nanan Villalba
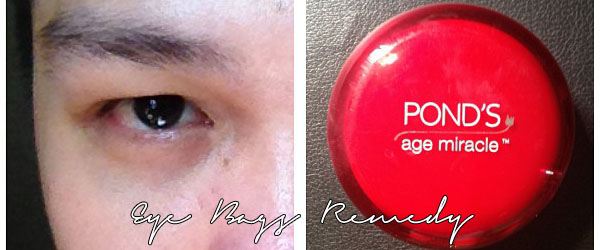
Having problems with eye bags? Fine line and crows feet?
I had the same problem since I have eye bags too. I have fine lines and crows feet as well.
What I do to keep them at bay and prevent from having them again is I use Pond's age miracle Dual Action Eye Cream. I only use this before going to sleep (I use different product during day time).
Pond's age miracle Dual Action Eye Cream has two different cream in two different formula inside. 1st cream (with pink color) I put on lid and 2nd cream (which is white) I put on under eye area.
I've been using this since 2011 and it helps reduce eye bags discoloration, reduce puffiness, and reduce/prevent fine lines and crows feet.
I am hesitant to use it at first because the more popular product didn't help me at all, but my make-up instructor and friend told me to try it since it works really well on her. And I'm glad she was able to convince me because it works well on me too.
Having the same problem? Try using Pond's age miracle Dual Action Eye Cream too, this might be the one solution you've been looking for.
1. Exfoliate your lips by brushing it gently before you sleep at night.
2. Then using cotton bud get half a pea size amount of Carmex and roll the cotton bud onto the lips until dry skin is removed and lips are smooth.
3. Use carmex the next day and make sure to purse lips together.
Carmex is effective yet affordable. Available in pots and in tubes. I use this on both male and female clients.
Wanted to get slim crease detail that is blended really well? Yes? Then I recommend this brush from ArtNet Professional Paris. Brush no 153 is a small blending brush that will blend your crease detail and cut-crease really well. Because the tip is small and pointy it will not over-blend and erase the detail that you just created. The crease will look natural and well blended in seconds.
I had this brush for 2 years now and it looks and feels like new.
Here's a closer look of the brush hair.
Since I've been working with more than one face in one session, I decided to buy a new one.
But I was disappointed because the newer ones aren't like the one I purchased before. The tip is rounded unlike the one I bought first which is pointed. It still does the work but there's a risk of over-blending because the tip is not tapered to a point.
Closer look on the brushes' head/hair.
When you decide to buy one make sure to examine the brush head carefully and choose the one with hairs that are tapered to a point.
I really like this brush a lot. It's not the softest, I must say, but you can't go wrong with it. It's just sad that the new one I bought is not as pointy as the first brush.
This brush is available in Robinson's Manila and Robinson's Galleria.
Verdict: Love. Like. Nice. Skip. Drain.
It could have been love if not for the second purchase.
I've got the privilege to interview Pia Gladys Perey and discussed with her her experience at LA Style Fashion Week 2013. The interview was published in Diaryo Filipino - A Filipino/Canadian Newspaper based in Alberta, Canada.
Read below for my interview with the talented Philippines' queen of drapes Pia Gladys Perey:
Pia Gladys Perey Wows At Style Fashion Week
by Henry G. Anima II
Despite Pia Gladys Perey’s usual busy schedule she
managed to find time to discuss with me, her latest
collection from Style Fashion Week in Los Angeles.
Pia Gladys Perey (PGP) is well known for her mastery
in drapes. Her collection is often very feminine
and very elegant. Celebrities like Grabielle Union
and Angelina Jolie already wore some of her designs.
From PGP Press Release: “The collection opened
with separates of armored gold and high shine
black that felt like leather, this added an edge to the
collection that kept it fresh and very bankable at
retail. The collection moved into hues such as teal,
cadet blue, pine green, and pistachio to the houses
default set of neutrals in classic PGP styling.”
When you were invited again to showcase a collection
on Style Fashion Week in LA, what was your initial reaction?
PGP: This is actually my third time to get invited to
LA fashion week and this year, I felt that it is time to
participate since I have been blessed with a lovely
team.
How did the organizers (of Style Fashion Week) know
about you and your designs?
PGP: I think through my presence online and in
the Australian market J.
When you finally decided to join, what were the first
few things that you have to consider?
PGP: Team, budget and of course the long term effect
of the show to my line in terms of sales and PR.
What was your inspiration behind your collection?
PGP: Luxury and Romance.
What are the challenges, if any, that you had to face in
doing and presenting your collection?
PGP: This collection’s challenge was only just really
designing the collection. I was so pressed for time
and I didn’t feel the inspiration until a few weeks
before the launch!
How did you handle it?
PGP: Like what I always do, I hit the beach and refresh
my mind
Congratulations on the standing ovation - the crowd
really loved your collection. Now that the world knows
the potential and greatness of the Pia Gladys Perey label,
what direction are you going to take it in the future?
PGP: We are opening a store in LA (Melrose Ave) in
June, along with this, we are doing very aggressive
moves for sales and PR in the US market.
If people want to know more about you, and inquire
your designs, how can they reach you?
PGP: People can go to our website
www.piagladysperey.net
I've got the privilege to interview Veejay Floresca and discussed with him his experience on Vancouver Fashion Week Fall/Winter 2013. The interview was published in Diaryo Filipino - A Filipino/Canadian Newspaper based in Alberta, Canada.
Read below for my interview with the talented and amazing Veejay Floresca:
Spotlight On Veejay Floresca
by Henry G. Anima II
I got really excited upon learning that Veejay Floresca, a
young and very successful Filipino designer, was invited
to have a show in Vancouver Fashion Week Fall/Winter
2013 (as shown on photos below). I’ve seen his creations
long before he landed third place in the hit fashion reality
TV show Project Runway Philippines (Season 1). Since
then Veejay’s career as a designer has taken off very well.
And now, he has become one of the most sought after
young designers in the Philippines.
After seeing his collection on a live stream video, which I
really like a lot, I knew I had to feature him and his collection
here in Diaryo Filipino to let more people about him.
First of all I’d like to congratulate you on the success of
your show at the Vancouver Fashion Week Fall/Winter
2013. What did you feel when you got the invite to present
a collection at Vancouver Fashion Week Fall/Winter
2013?
VF: I was very nervous! haha.. ‘coz it’s my first international
fashion show, and my first time to do a Fall collection.
I’ve done several collections before but it’s in the
Philippines, so definitely the biggest challenge for me was
to create a collection for a more global market.
What was your inspiration behind the collection? And
what is the collection called?
VF: I took inspiration from the old photographs of my
mom. I still remember those days when I would always
browse through her old albums looking at the clothes, the
fashion during her time. Fashion is a cycle, so I thought of
getting that as my main inspiration. There’s no name for
this collection.
It’s about layering and outerwear that’s perfect for women
who love fashion and style.
What are the challenges that you had to face in creating
this collection?
VF: The biggest challenge for me was to come up with a
collection ONLINE.
I am here in San Francisco now taking up my Masters in
Fashion Design at Academy of Art University. Doing this
collection online needs a lot of time and effort, but [it’s]
worth-it. I have a very skilled and efficient team in Manila.
We maximized the advantage of advanced technology
to keep in touch and in doing the collection.
I know you’re studying in San Francisco now but can
you tell me more about it?
VF: My course is Masters in Fine Arts Major in Fashion Design.
I am learning so much. I thought what I learned in my
undergraduate in College of Saint Benilde was enough,
but I was wrong. Studying here made me a better designer.
I learned more techniques and advanced lessons about
pattern making, clothing construction and I was challenged
to cope up with their high standards.
I also learned to develop my own style and to be more versatile
as a designer without losing my own personal style
as a designer. In the Philippines, many designers love
dresses or gowns. Haha... I like them, too because that’s
the market. But when I came here, I became more mature.
As much as possible, I keep myself from what I would usually
do in Manila. So now I am focusing in designing separates
such as coats, trousers, jackets, tops which is more
challenging!
I know that you are designing for people from different
parts of the world. Tell me about that.
VF: Yes, I am indeed lucky to have a market of clients
abroad. I appreciate the trust they give me.
Who would have thought that we could use a smartphone
to communicate with clients abroad. How do
maximize the use of it in your business? To close a
deal?
VF: We are now moving towards a more diverse world and
there is a need to elevate our business modules to reach
out to a bigger market.
Majority of my clients now are people from all over the
world. They don’t meet me personally, but we chat, Skype,
email, and those are just some of the useful ways we do
to work together.
What are your future goals?
VF: I want to finish my school and hopefully, join more
international fashion shows, establish another branch
here in SFO or NYC, continue my scholarship programs
for aspiring fashion designers, and get married and build
my own family at the age of 35.
What advise can you give budding designers out there?
VF: I think as designers, we need to challenge ourselves
and not to always stay in our comfort zones.
You may contact Veejay through his e-mail address at
veejayfloresca@gmail.com
Another brush that caught my eye is Charm Pro Big Blending Brush #11. I think I already have 12 blending brushes but additional 2 won't hurt, right? Yes I bought two of these. What makes this brush very appealing to me is the hair color - which is white (just like my MAC 217 brushes). Most of my blending brushes are either black or brown (the two different ones are the stippling eye blending brush and the blending+dome eye brush that comes with Urban Decay's Naked 2 palette).
Here’s what the website tells about Charm Pro Big Blending Brush #11:
Charm PRO Makeup Brushes are made from the best quality and precise craftsmanship that will ensure you professional results in your makeup application!
The CHARM PRO Blending Brush is a must-have as a blending brush, as it de nes and contours your crease, and also blends eyeshadow into a seamless gradient. Made with the right fi rmness, it gives you control while blending your eyeshadow.
I have this brush for more than a month already and I already used, cleaned and washed it a couple of times so I think I can also do a review of it now just like the Charm Pro Eye Shader Brush #7.
Front View and Top View
While most of my blending brushes are really soft Charm Pro Big Blending Brush #11 is not that soft, which makes this brush unique among my blending brushes. And I like it that way.
It is not stiff but is firm enough not to over-blend eye shadow color, which really helps when I needed a blending brush to do that for me. This brush helps me achieve a certain gradient that don’t fade the color, which happens when you over-blend.
My Charm Pro Big Blending Brush #11 brushes.
Among my blending brushes Charm Pro Big Blending Brush #11 is the densest. It picks up color really well and helps me blend the outer V and crease area without over-blending. And since the brush is dense, I really like using it to blend concealer on the under eye area and corners of the nose.
I also like to use this brush on creamy products like the Maybelline 24 Hour Color Tattoo.
Since this is not the softest blending brush you need to blend the eye shadow more if you want to use it that way (which I don't on this brush) since I’m using another blending brush for that purpose. Sometimes it is a bit scratchy but not to the point that it hurts the area where you use it so it is not a big deal. There are few hairs that shed but nothing sheds after two washes.
I really like the white hair.
This retails for Php 399.00 but I got it with 10% discount at The Ramp Glorietta.
Verdict: Love. Like. Nice. Skip. Drain.
I am satisfied with the 2 Charm Pro Big Blending Brush #11 brushes that I have. It picks up color really well and does not over-blend and losing all the definition of the eye shadow color. I can also use it on concealers to blend the edges and creamy eye shadows from placing wash of color as base to building the color intensity to my liking.
I really like brushes in fact I have more than a hundred already. And when I happen to see one on the mall I just can’t help myself but try it.
One that caught my attention was the Charm PRO Eye Shader Brush #7. Charm PRO Eye Shader Brush #7 reminds me of the MAC 239 brush – the tapered-rounded shape and white colored hair look really similar to each other. So I really got excited and bought 2 instantly.
Here’s what the website tells about Charm PRO Eye Shader Brush #7:
Charm PRO Makeup Brushes are made from the best quality and precise craftsmanship that will ensure you professional results in your makeup application!
The Charm PRO Eye Shader Brush is a very dense brush that picks up substantial amount of eyeshadow and packs on vivid colors on the eyelids.
I have this brush for more than a month already and I already used, cleaned and washed it a couple of times so I think I can do a review of it now.
I really like dense brushes that pickup colors, deposit the colors well and that are soft. Charm PRO Eye Shader Brush #7 picks up color well and deposits it well on the eyelids, however, the brush is so scratchy it hurts the eye area where you put colors specially when you use it for shading to smoke-out the color.
The brush is not soft but not stiff. When you use the top-edge side of the brush to blend the outer v and crease area and deposit color on the lower lash line it scratches and pokes the area.
The one on the left sheds like crazy which does not happen with the one on the right.
I mentioned earlier that I’ve got two and one of the brushes shed like crazy which does not happen with the other brush. And it’s kind of hard to clean it.
The good thing about this brush is that it picks up color, deposit color well and minimize eye shadow fall-out so I'll only use this brush for that purpose only (I don't recommend this brush for blending and shading the lid and crease areas and placing color on the lower lash line). But I was disappointed with it because it hurts the eye unlike Charm PRO Big Blending Brush #11 (that I really like).
This retails for Php 350.00 but I got it with 10% discount at The Ramp Glorietta.
Verdict: Love. Like. Nice. Skip. Drain.
Although it delivers its promise of picking up and packing color (almost like MAC 239 and actually better than other brushes for that purpose) I just can’t stand that it scratches and pokes the area where you use it.
Do you hate it when you have to throw away your empty mascara tube along with it your favorite mascara wand? Or having your favorite mascara but you doesn’t really like the wand that comes with it? I certainly do.
Now, I got a little quick suggestion for you. Throw your empty mascara tube but save the mascara wand. Just clean your wand and reuse it! Here’s how I do it:
First, gather all the things you need:
Your empty mascara tube with your favorite wand with it.
Dishwashing soap (preferably with antibacterial formulation) and bowl or container (big enough to soak the wand).
Brush cleaner.
Tissue or towel, old toothbrush and zip locks.
Here’s how I clean my favorite mascara wands:
Put dishwashing soap in an empty container.
Soak your favorite mascara wand overnight. This will remove the mascara from the wand when mixed with dishwashing soap.
Brush gently your mascara wand with old toothbrush to remove mascara off the wand.
Put your wand under running water until all mascara is gone.
Then roll your wand on a towel to dry it.
Then place your wand on top of a tissue and spray it with a brush cleaner.
Then roll it on the tissue and place it on top of another tissue to dry.
Now your favorite mascara is clean and is now ready to use. Just put it on a zip lock for storage and to prevent it from getting dirty.
How to use your favorite mascara wand:
Choose your favorite mascara then take ample amount off the mascara (from the wand that comes with it) and place it on a mixing palette or at the back of your hand.
Get your favorite (clean) mascara wand and swipe it gently on the mascara you placed on the mixing palette or at the back of your hand.
Swipe the mascara onto your lashes.
Now you have a great looking lashes using your favorite mascara and your favorite mascara wand.
Sometimes when you are mixing and painting two different colors of lipstick on a client (or yourself) the process can be messy and can be time consuming. Sometimes you end up putting color on other tube then staining and ruining the original color. To save time and prevent you from getting messy during mixing two different colors of lipstick (on actual makeup application) follow the simple steps to create your own mix of lip color below.
Note: If you are a kid make sure you ask your parent (or an adult) to assist you.
Using the spatula, slice a portion of your favorite lipstick and place it on the spoon. Clean your spatula then slice another portion of lipstick with different color and add it to the first lip color. It is up to you to place the ratio of two different colors. Just add some more to achieve the color you want.
Then place it above a flame with medium heat (I place mine over a stove but you may use a candle and it will do the trick) to melt.
Mix the lipstick by stirring then well with spatula when melted to get an even mixture.
Place the mixture on an empty palette or jar and allow the mixture to harden.
Congrats! You got yourself a new shade of lip color! Just use your lip brush to get color from the pan and apply it to yourself. Easy, right?
Enjoy creating your lip color too and let me know what you think about it.
That's it but you may check more photos below for more color mixtures I created.
Here's another mixture. Lovely color, right?
You may also mix the two lip colors together before melting to create your new lip color a bit faster.
I created a total of 11 lip colors by mixing different lip colors and different rations. Check all the colors and ratios below:
Mix 1, 2 and 3.
Mix 4, 5 and 6.
Mix 7, 8 and 9.
Mix 10 and 11.
And here are the new shades of lip colors I created on a palette. I numbered the colors based on the mixtures above. The ones with no numbers are the original shades I used to create the new lip colors.
Palette 1.
Palette 2.
QUICK TIP: If you are a bit OC you may use hair blow drier to make your lip color look even and a lot better in your palette. Just let the heat from the blower melt the top part slowly to even it out in the palette (see photo below).




 Posts
Posts


